정적 파일은 static 폴더에 html 파일 및 css, js, images 등 추가할 수 있다 

1. 템플릿 엔진 JSP 사용하기로 결정 됨 (의존성) 확인 필요 
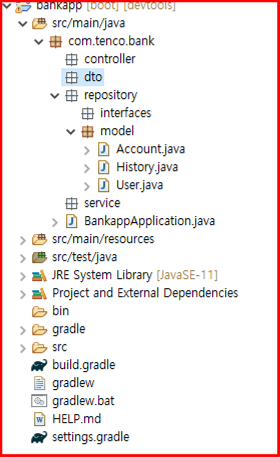
2. yml 설정 확인하기 (폴더 구조 확인)  
3. bootstrap 4 css 프레임워크 사용하기 
4. layout 구성 하기  (https://picsum.photos/ 사용 )

의존성 추가 확인

implementation 'org.apache.tomcat.embed:tomcat-embed-jasper'

implementation 'javax.servlet:jstl'


환경 설정 확인

spring:
  mvc:
    view:
      prefix: /WEB_INF/view/
      suffix: .jsp
      
spring boot 에서 ViewResolver 는 컨트롤러가 반환한 뷰 이름과 매핑하여 
해당 뷰 파일을 찾고, 렌터링 하는 일을 수행 하는 인터페이스 입니다. 

/WEB-INF/view/xxx/xxx.jsp

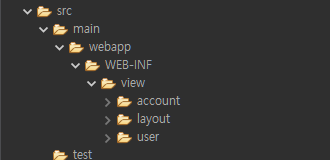
main.jsp 기본 화면 적용해보기

<%@ page language="java" contentType="text/html; charset=UTF-8"
	pageEncoding="UTF-8"%>
<html lang="en">
<head>
<title>My Bank</title>
<meta charset="utf-8">
<meta name="viewport" content="width=device-width, initial-scale=1">
<link rel="stylesheet"
	href="https://cdn.jsdelivr.net/npm/bootstrap@4.6.2/dist/css/bootstrap.min.css">
<script
	src="https://cdn.jsdelivr.net/npm/jquery@3.6.4/dist/jquery.slim.min.js"></script>
<script
	src="https://cdn.jsdelivr.net/npm/popper.js@1.16.1/dist/umd/popper.min.js"></script>
<script
	src="https://cdn.jsdelivr.net/npm/bootstrap@4.6.2/dist/js/bootstrap.bundle.min.js"></script>
<style>
.fakeimg {
	height: 200px;
	background: #aaa;
}
/* 배너 백그라운드 처리하기  */
.banner--img {
	background-image: url('https://picsum.photos/600');
	background-size: cover;
	background-position: center;
	width: 100%;
}

.m--profile {
	background-image: url('https://picsum.photos/id/1/350');
	background-size: cover;
	background-position: center;
	width: 100%;
	height: 200px;
}

.m--title {
	color: aqua;
}
</style>
</head>
<body>

	<div class="jumbotron text-center banner--img" style="margin-bottom: 0">
		<h1 class="m--title">My Bank</h1>
		<img alt="sample" src="https://picsum.photos/300/200">
	</div>

	<nav class="navbar navbar-expand-sm bg-dark navbar-dark">
		<a class="navbar-brand" href="#">MENU</a>
		<button class="navbar-toggler" type="button" data-toggle="collapse"
			data-target="#collapsibleNavbar">
			<span class="navbar-toggler-icon"></span>
		</button>
		<div class="collapse navbar-collapse" id="collapsibleNavbar">
			<ul class="navbar-nav">
				<li class="nav-item"><a class="nav-link" href="#">Home</a></li>
				<li class="nav-item"><a class="nav-link" href="#">SignIn</a></li>
				<li class="nav-item"><a class="nav-link" href="#">SignUp</a></li>
			</ul>
		</div>
	</nav>

	<div class="container" style="margin-top: 30px">
		<div class="row">
			<div class="col-sm-4">
				<h2>About Me</h2>
				<h5>Photo of me:</h5>
				<div class="m--profile"></div>
				<p style="padding: 8px 0">자라나는 코린이에 은행 관리 시스템 입니다</p>
				<h3>Some Links</h3>
				<p>Lorem ipsum dolor sit ame.</p>
				<ul class="nav nav-pills flex-column">
					<li class="nav-item"><a class="nav-link" href="#">계좌생성</a>
					</li>
					<li class="nav-item"><a class="nav-link"  href="#">계좌목록</a></li>
					<li class="nav-item"><a class="nav-link" href="#">출금</a></li>
					<li class="nav-item"><a class="nav-link" href="#">입금</a></li>
					<li class="nav-item"><a class="nav-link" href="#">이체</a></li>
					<li class="nav-item"><a class="nav-link disabled" href="#">My Info</a>
					</li>
				</ul>
				<hr class="d-sm-none">
			</div>


			<!-- todo main 영역으로 지정 예정  -->
			<div class="col-sm-8">
				<h2>TITLE HEADING</h2>
				<h5>Title description, Dec 7, 2017</h5>
				<div class="fakeimg">Fake Image</div>
				<p>Some text..</p>
				<p>Sunt in culpa qui officia deserunt mollit anim id est laborum
					consectetur adipiscing elit, sed do eiusmod tempor incididunt ut
					labore et dolore magna aliqua. Ut enim ad minim veniam, quis
					nostrud exercitation ullamco.</p>
				<br>
			</div>
		</div>
	</div>
	
	<div class="f-wrap">
		<div class="jumbotron text-center" style="margin-bottom: 0">
			<p>Footer</p>
		</div>
	</div>
</body>
</html>

layout 구성 하기

header.jsp 파일 생성 및 설정

footer.jsp 파일 생성 및 설정

css 폴더 생성 및 설정


header.jsp

<%@ page language="java" contentType="text/html; charset=UTF-8"
	pageEncoding="UTF-8"%>
<html lang="en">
<head>
<title>My Bank</title>
<meta charset="utf-8">
<meta name="viewport" content="width=device-width, initial-scale=1">
<link rel="stylesheet"
	href="https://cdn.jsdelivr.net/npm/bootstrap@4.6.2/dist/css/bootstrap.min.css">
<script
	src="https://cdn.jsdelivr.net/npm/jquery@3.6.4/dist/jquery.slim.min.js"></script>
<script
	src="https://cdn.jsdelivr.net/npm/popper.js@1.16.1/dist/umd/popper.min.js"></script>
<script
	src="https://cdn.jsdelivr.net/npm/bootstrap@4.6.2/dist/js/bootstrap.bundle.min.js"></script>
<style>
.fakeimg {
	height: 200px;
	background: #aaa;
}
/* 배너 백그라운드 처리하기  */
.banner--img {
	background-image: url('https://picsum.photos/600');
	background-size: cover;
	background-position: center;
	width: 100%;
}

.m--profile {
	background-image: url('https://picsum.photos/id/1/350');
	background-size: cover;
	background-position: center;
	width: 100%;
	height: 200px;
}

.m--title {
	color: aqua;
}
</style>
</head>
<body>

	<div class="jumbotron text-center banner--img" style="margin-bottom: 0">
		<h1 class="m--title">My Bank</h1>
		<img alt="sample" src="https://picsum.photos/300/200">
	</div>

	<nav class="navbar navbar-expand-sm bg-dark navbar-dark">
		<a class="navbar-brand" href="#">MENU</a>
		<button class="navbar-toggler" type="button" data-toggle="collapse"
			data-target="#collapsibleNavbar">
			<span class="navbar-toggler-icon"></span>
		</button>
		<div class="collapse navbar-collapse" id="collapsibleNavbar">
			<ul class="navbar-nav">
				<li class="nav-item"><a class="nav-link" href="#">Home</a></li>
				<li class="nav-item"><a class="nav-link" href="#">SignIn</a></li>
				<li class="nav-item"><a class="nav-link" href="#">SignUp</a></li>
			</ul>
		</div>
	</nav>

	<div class="container" style="margin-top: 30px">
		<div class="row">
			<div class="col-sm-4">
				<h2>About Me</h2>
				<h5>Photo of me:</h5>
				<div class="m--profile"></div>
				<p style="padding: 8px 0">자라나는 코린이에 은행 관리 시스템 입니다</p>
				<h3>Some Links</h3>
				<p>Lorem ipsum dolor sit ame.</p>
				<ul class="nav nav-pills flex-column">
					<li class="nav-item"><a class="nav-link" href="#">계좌생성</a>
					</li>
					<li class="nav-item"><a class="nav-link"  href="#">계좌목록</a></li>
					<li class="nav-item"><a class="nav-link" href="#">출금</a></li>
					<li class="nav-item"><a class="nav-link" href="#">입금</a></li>
					<li class="nav-item"><a class="nav-link" href="#">이체</a></li>
					<li class="nav-item"><a class="nav-link disabled" href="#">My Info</a>
					</li>
				</ul>
				<hr class="d-sm-none">
			</div>

footer.jsp

<%@ page language="java" contentType="text/html; charset=UTF-8"
    pageEncoding="UTF-8"%>
		
		</div>
	</div>
	
	<div class="f-wrap">
		<div class="jumbotron text-center" style="margin-bottom: 0">
			<p>Footer</p>
		</div>
	</div>
</body>
</html>

main.jsp

<%@ page language="java" contentType="text/html; charset=UTF-8"
	pageEncoding="UTF-8"%>
	
<%@ include file="/WEB-INF/view/layout/header.jsp" %>


			<!-- todo main 영역으로 지정 예정  -->
			<div class="col-sm-8">
				<h2>TITLE HEADING</h2>
				<h5>Title description, Dec 7, 2017</h5>
				
				<br>
			</div>
			
<%@ include file="/WEB-INF/view/layout/footer.jsp" %>


'Spring boot > spring boot 앱 만들어 보기 2 단원' 카테고리의 다른 글

bank app - Exception Handler  (0) 2023.04.18
bank app - 화면 구현(2)  (0) 2023.04.17
bank app MyBatis 설정  (0) 2023.04.17
bank app - h2 db 초기 값 설정  (0) 2023.04.17
bank app 모델링  (0) 2023.04.17
1. MyBatis 에 대한 개념 
2. yml 파일에 MyBaits 설정 하기 (의존성 추가 되어 있는 상태)
3. UserRepository 인터페이스 선언 하기 
4. user.xml 파일 정의 
5. AccountRepository 인터페이스 선언 
6. account.xml 파일 정의 
7. HistoryRepository 인터페이스 선언 
8. history.xml 파일 정의

MyBatis

자바 객체와 SQL문 사이의 자동 매핑을 지원하는 매퍼프레임 워크입니다. 

MyBatis에서는 SQL 쿼리를 작성할 때 XML 또는 어노테이션을 이용해서 작업할 수 있습니다. 
이를 통해 쿼리 구문을 작성하고 데이터 베이스와 통신을 수행할 수 있습니다. 

MyBatis는 매우 유연한 구조를 가자고 있어 SQL 쿼리와 자바 객체의 매핑 규칙을 
세부적으로 지정할 수 있으며 동적 SQL 쿼리 구문을 작성할 수 있게 지원합니다.

mybatis yml 파일에 설정하기

: ibatis ← 이전 이름 ( 2.4 이 후부터는 mybatis 변경 됨)

server:
  port: 8080
  servlet:
    encoding:
      charset: utf-8
      force: true
      

spring:
  mvc:
    view:
      prefix: /WEB-INF/view/
      suffix: .jsp
  datasource:
    url: jdbc:h2:mem:testdb;MODE=MySQL
    driver-class-name: org.h2.Driver
    username: sa
    password: 
  sql:
    init:
      schema-locations:
      - classpath:db/table.sql
      data-locations:
      - classpath:db/data.sql

  h2:
    console:
      enabled: true
  output:
    ansi: 
      enabled: always
      
      
mybatis:
  mapper-locations:
  - classpath:mapper/**.xml    
  configuration:
    map-underscore-to-camel-case: true

UserRepository 인터페이스 선언 하기

@Mapper  // MyBatis 의존 설정 함(build.gradle 파일) 
public interface UserRepository {
	public int insert(User user);
	public int updateById(User user); 
	public int deleteById(Integer id);
	public User findById(Integer id); 
	public List<User> findAll();
}

mapper/user.xml 파일 생성 DB 접근 기술 - UserDAO를 구현 했다면
Mybatis 는 xml 파일로 설정 합니다.
이점은 Connection, PreparedStatement, ResultSet
알아서 관리 및 매핑 해주고 close 처리를 자동으로 해준다.

user.xml 파일 정의

<?xml version="1.0" encoding="UTF-8"?>
<!DOCTYPE mapper PUBLIC "-//mybatis.org//DTD Mapper 3.0//EN"
"http://mybatis.org/dtd/mybatis-3-mapper.dtd">
<mapper namespace="com.tenco.bank.repository.interfaces.UserRepository"> 
	
	<insert id="insert">
		insert into user_tb (username, password, fullname, created_at)
		values( #{username}, #{password}, #{fullname}, now())
	</insert>
	
	<update id="updateById">
		update user_tb set username = #{username}, password = #{password}, 
		                fullname = #{fullname} where id = #{id}
	</update>
	
	<delete id="deleteById">
		delete from user_tb where id = #{id}
	</delete>
	
	
	<select id="findById" resultType="com.tenco.bank.repository.model.User">
		select * from user_tb where id = #{id}
	</select>
	
	<select id="findAll" resultType="com.tenco.bank.repository.model.User">
		select * from user_tb
	</select>
	
	
</mapper>

AccountRepository 인터페이스 선언

package com.tenco.bank.repository.interfaces;

import java.util.List;

import org.apache.ibatis.annotations.Mapper;

import com.tenco.bank.repository.model.Account;

@Mapper // mybatis 연결 처리 
public interface AccountRepository {
	
	public int insert(Account account); 
	public int updateById(Account account); 
	public int deleteById(int id); 
	
	public List<Account> findAll();   
	public Account findById(int id); 
}

account.xml 파일 정의

<?xml version="1.0" encoding="UTF-8"?>
<!DOCTYPE mapper PUBLIC "-//mybatis.org//DTD Mapper 3.0//EN"
"http://mybatis.org/dtd/mybatis-3-mapper.dtd">
<mapper namespace="com.tenco.bank.repository.interfaces.AccountRepository"> 
	
	<insert id="insert">
		insert into account_tb(number, password, balance, user_id, created_at)
		values(#{number}, #{password}, #{balance}, #{userId}, now())
	</insert>	
	
	<update id="updateById">
		update account_tb set number = #{number}, password = #{password},
			balance = #{balance}, user_id = #{userId} where id = #{id}
	</update>
	
	<delete id="deleteById">
		delete from account_tb where id = #{id}
	</delete>
	
	<select id="findById" resultType="com.tenco.bank.repository.model.Account">
		select * from account_tb where id = #{id}
	</select>
	
	<select id="findAll" resultType="com.tenco.bank.repository.model.Account">
		select * from account_tb 
	</select>
</mapper>

HistoryRepository 인터페이스 선언

package com.tenco.bank.repository.interfaces;

import java.util.List;
import org.apache.ibatis.annotations.Mapper;
import com.tenco.bank.repository.model.History;

@Mapper // 반드시 지정하기 ! 
public interface HistoryRepository {
	
	public int insert(History history); 
	public int updateById(History history); 
	public int deleteById(int id); 
	public History findById(int id);
	public List<History> findAll(); 
	
}

history.xml 파일 정의

<?xml version="1.0" encoding="UTF-8"?>
<!DOCTYPE mapper PUBLIC "-//mybatis.org//DTD Mapper 3.0//EN"
"http://mybatis.org/dtd/mybatis-3-mapper.dtd">
<mapper
	namespace="com.tenco.bank.repository.interfaces.HistoryRepository">

	<insert id="insert"
		parameterType="com.tenco.bank.repository.model.History">
		insert into
		history_tb(
		amount, w_balance, d_balance,
		w_account_id, d_account_id
		)
		values(
		#{amount}, #{wBalance}, #{dBalance},
		#{wAccountId}, #{dAccountId}
		)
	</insert>

	<update id="updateById"
		parameterType="com.tenco.bank.repository.model.History">
		update history_tb
		set amount = #{amount},
		w_balance =	#{wBalance},
		d_balace = #{dBalance},
		w_account_id = #{wAccountId},
		d_account_id = #{dAccountId}
		where id = #{id}
		
	</update>

	<delete id="deleteById" parameterType="int">
		delete from history_tb
		where id = #{id}
	</delete>
	
	<select id="findById" resultType="com.tenco.bank.repository.model.History">
		select * from history_tb where id = #{id}
	</select>

	<select id="findAll" resultType="com.tenco.bank.repository.model.History">
		select * from history_tb
	</select>


</mapper>


'Spring boot > spring boot 앱 만들어 보기 2 단원' 카테고리의 다른 글

bank app - 화면 구현(2)  (0) 2023.04.17
bank app 화면 구현(1)  (0) 2023.04.17
bank app - h2 db 초기 값 설정  (0) 2023.04.17
bank app 모델링  (0) 2023.04.17
패키지 설정  (0) 2023.04.17

H2 메모리 DB 초기 테이블 설정 및 초기 데이터 셋팅

1. yml 파일 확인 및 추가 설정

2. H2 인 메모리 접근 및 데이터 확인


yml 설정

server:
  port: 8080
  servlet:
    encoding:
      charset: utf-8
      force: true


spring:
  mvc:
    view:
      prefix: /WEB_INF/view/
      suffix: .jsp
  datasource:
    url: jdbc:h2:mem:testdb;MODE=MySQL
    driver-class-name: org.h2.Driver
    username: sa
    password:
  sql: 
    init:
      schema-locations:
      - classpath:db/table.sql  
      data-locations:
      - classpath:db/data.sql
      
  h2:
    console:
      enabled: true
  output:
    ansi: 
      enabled: always

초기 스키마 설정

-- 유저 테이블 설계해 보기 
CREATE TABLE user_tb(
	id int AUTO_INCREMENT PRIMARY KEY, 
    username VARCHAR(50) not null UNIQUE, 
    password VARCHAR(30) not null, 
    fullname VARCHAR(50) not null, 
    created_at TIMESTAMP not null DEFAULT now()
);

-- 사용자에 계좌 정보 테이블 설계 
CREATE TABLE account_tb(
	id int AUTO_INCREMENT PRIMARY KEY, 
    number VARCHAR(30) not null UNIQUE, 
    password VARCHAR(20) not null, 
    balance BIGINT not null COMMENT '계좌 잔액',
    user_id int, 
    created_at TIMESTAMP not null DEFAULT now()
);

-- 입금 내역 저장 
-- 출금 내역 저장 
-- 사용자간 이체 내역 저장 

-- 사용자들에 history 테이블 설계 
-- BIGINT 8바이트 크기에 정수형 
-- 조(10에 12) -- 경(10에 16승) -- 해(10에20승)
-- 자(10에 24) -- 양(10에 28)
 
 
CREATE TABLE history_tb(
	id int AUTO_INCREMENT PRIMARY key COMMENT '거래 내역 ID', 
	amount BIGINT not null COMMENT '거래 금액',
	w_account_id int COMMENT '출금 계좌 id',
	d_account_id int COMMENT '입금 계좌 id',
	w_balance BIGINT COMMENT '출금 요청된 계좌에 잔액',
	d_balance BIGINT COMMENT '입금 요청된 계좌에 잔액', 
	created_at TIMESTAMP not NULL DEFAULT now() 
);

초기 데이터 등록

INSERT INTO user_tb(username, password, fullname, created_at) values('길동', '1234',
'고', now());
INSERT INTO user_tb(username, password, fullname, created_at) values('둘리', '1234',
'애기공룡', now());
INSERT INTO user_tb(username, password, fullname, created_at) values('콜', '1234',
'마이', now());


INSERT INTO account_tb(number, password, balance, user_id, created_at)
values('1111', '1234', 900, 1, now());
INSERT INTO account_tb(number, password, balance, user_id, created_at)
values('2222', '1234', 1100, 2, now());
INSERT INTO account_tb(number, password, balance, user_id, created_at)
values('333', '1234', 0, 3, now());


-- 이체 내역을 기록 ( 1번 계좌에서 2번 계좌로 100원을 이체 한다) 
INSERT INTO history_tb(amount, w_balance, d_balance, 
					   w_account_id, d_account_id, created_at)
VALUES (100, 900, 1100, 1, 2, now());

-- 출금 내역 ( 1번계좌에서 100원을 출금 처리 )
INSERT INTO history_tb(amount, w_balance, d_balance, 
					   w_account_id, d_account_id, created_at)
VALUES (100, 800, null, 1, null, now());

-- 입금 내역 (1번 계좌에 500원 입금 처리 )
INSERT INTO history_tb(amount, w_balance, d_balance, 
					   w_account_id, d_account_id, created_at)
VALUES (500, null, 700, null, 1, now());

결과 확인

'Spring boot > spring boot 앱 만들어 보기 2 단원' 카테고리의 다른 글

bank app 화면 구현(1)  (0) 2023.04.17
bank app MyBatis 설정  (0) 2023.04.17
bank app 모델링  (0) 2023.04.17
패키지 설정  (0) 2023.04.17
프로젝트 설정  (0) 2023.04.17
TRM 기반으로 모델링을 해보자 

Table Relational mapping은 데이터베이스의 테이블과 애플리케이션의 객체 간의 매핑을 의미합니다. 

MyBatis에서는 데이터베이스 쿼리를 XML 파일로 작성하고, 
Java 코드에서 이를 호출하는 방식으로 데이터베이스와의 상호작용을 수행합니다. 
XML 파일에서는 SQL 쿼리를 작성하고, Java 코드에서는 이를 호출하여 결과를 반환합니다.

1. 테이블 설계 
2. 비지니스 로직 기본 확인 
3. 모델링 구현

user.xml 파일

<select id="selectUserById" resultType="User">
  SELECT id, name, email
  FROM user
  WHERE id = #{id}
</select>

테이블 설계

CREATE DATABASE bank;
use bank;

-- 유저 테이블 설계해 보기 
CREATE TABLE user_tb(
	id int AUTO_INCREMENT PRIMARY KEY, 
  username VARCHAR(50) not null UNIQUE, 
  password VARCHAR(30) not null, 
  fullname VARCHAR(50) not null, 
  created_at TIMESTAMP not null DEFAULT now()
);

-- 사용자에 계좌 정보 테이블 설계 
CREATE TABLE account_tb(
	id int AUTO_INCREMENT PRIMARY KEY, 
    number VARCHAR(30) not null UNIQUE, 
    password VARCHAR(20) not null, 
    balance BIGINT not null COMMENT '계좌 잔액',
    user_id int, 
    created_at TIMESTAMP not null DEFAULT now()
);

-- 입금 내역 저장 
-- 출금 내역 저장 
-- 사용자간 이체 내역 저장 

-- 사용자들에 history 테이블 설계 
-- BIGINT 8바이트 크기에 정수형 
-- 조(10에 12) -- 경(10에 16승) -- 해(10에20승)
-- 자(10에 24) -- 양(10에 28)
 
 
CREATE TABLE history_tb(
	id int AUTO_INCREMENT PRIMARY key COMMENT '거래 내역 ID', 
	amount BIGINT not null COMMENT '거래 금액',
	w_account_id int COMMENT '출금 계좌 id',
	d_account_id int COMMENT '입금 계좌 id',
	w_balance BIGINT COMMENT '출금 요청된 계좌에 잔액',
	d_balance BIGINT COMMENT '입금 요청된 계좌에 잔액', 
	created_at TIMESTAMP not NULL DEFAULT now() 
);

테이블 설계 및 제약 설정

유저 샘플 데이터 
INSERT INTO user_tb(username, password, fullname, created_at) values('길동', '1234',
'고', now());
INSERT INTO user_tb(username, password, fullname, created_at) values('둘리', '1234',
'애기공룡', now());
INSERT INTO user_tb(username, password, fullname, created_at) values('콜', '1234',
'마이', now());

계좌 테이블 샘플 데이터 
INSERT INTO account_tb(number, password, balance, user_id, created_at)
values('1111', '1234', 900, 1, now());
INSERT INTO account_tb(number, password, balance, user_id, created_at)
values('2222', '1234', 1100, 2, now());
INSERT INTO account_tb(number, password, balance, user_id, created_at)
values('333', '1234', 0, 3, now());

자바 코드로 모델을 하기

User 모델링

package com.tenco.bank.repository.model;

import java.sql.Timestamp;

import lombok.Data;

@Data
public class User {
	private Integer id; 
	private String username; 
	private String password; 
	private String fullname; 
	private Timestamp createdAt;
}

Account 모델링

package com.tenco.bank.repository.model;

import java.sql.Timestamp;

import lombok.Data;

/**
 * 모델 클래스 
 */
@Data
public class Account {
	
	private Integer id;
	private String number; 
	private String password; 
	private Long balance; 
	private Integer userId; 
	private Timestamp createdAt; 
	
	public void withdraw(Long amount) {
		this.balance -= amount;
	}
	
	public void deposit(Long amount) {
		this.balance += amount;
	}
	
	// 패스워드 체크
	// 잔액 여부 확인 (출금시) 
	// 계좌 소유자 확인 
}
package com.tenco.bank.repository.model;

import java.sql.Timestamp;

import lombok.Data;

@Data
public class History {
	
	private Integer id;
	private Long amount;
	private Long wBalance;
	private Long dBalance;
	private Integer wAccountId;
	private Integer dAccountId;
	private Timestamp createdAt;
}

'Spring boot > spring boot 앱 만들어 보기 2 단원' 카테고리의 다른 글

bank app 화면 구현(1)  (0) 2023.04.17
bank app MyBatis 설정  (0) 2023.04.17
bank app - h2 db 초기 값 설정  (0) 2023.04.17
패키지 설정  (0) 2023.04.17
프로젝트 설정  (0) 2023.04.17
패키지 및 폴더 구조 잡기 

1. 정적 자원 관리 
src/main/resources/static ← 정적 자원 루트 폴더이다. 
css 폴더 생성 
images 폴더 생성(서버가 기본적으로 가지고 있어야 하는 앱 아이콘 등) 
js 폴더 생성 

2 개발 시 필요한 패키지 추가 
src/main/resources 
db 패키지 생성 ( .sql 파일 저장 - 초기 데이터 관리 )
mapper 패기지 생성 ( MyBatise 를 사용하기 위한 xml 파일)

3 템플릿 엔진 JSP 사용할 폴더 설정 
src/main/ → webapp 폴더 생성 
WEB-INF 폴더 생성 
view 폴더 생성 
view → layout 폴더, user폴더 , account 폴더 

4 자바 코드를 담을 패키지 설정 

controller 생성 
service 패키지 생성 
dto 패키지 생성 ← 추가 
repository 패키지 생성 
repository → model 패키지 생성 
repository → interfaces 패키지 생성 ( DAO 사용할 표준 - MyBatis mapper 연동 )

네이밍 컨벤션 정해보기

일관성 있는 네이밍 컨벤션을 유지하는 것이 중요 하다. 

정적 파일 : .css, image, xml - 스네이크 케이스 사용 ex)  xx_xx.css, xx_x.js 
jsp 파일 : xxx.jsp - 카멜 케이스 사용 :  ex) home.jsp,  accountPage.jsp 
java 파일 : 파스칼 케이스 사용 : ex) HomeController.java 
폴더 및 패키지 명 : 스네이크 케이스 사용 

HTML 태그 id, name 속성 : 카멜 케이스 사용 ex) userId, 
CSS 클래스명 : 소문자로 —> xxx - - xxx (외부 라이브러리랑 충돌 방지) 

데이터 베이스 
테이블 명 : 소문자 사용 - 스네이크 케이스 사용 tb 붙이기 : user_tb, account_tb 
컬럼명 : 스네이크 케이스 : user_id, 

DTO 클래스 
카멜케이션 사용


'Spring boot > spring boot 앱 만들어 보기 2 단원' 카테고리의 다른 글

bank app 화면 구현(1)  (0) 2023.04.17
bank app MyBatis 설정  (0) 2023.04.17
bank app - h2 db 초기 값 설정  (0) 2023.04.17
bank app 모델링  (0) 2023.04.17
프로젝트 설정  (0) 2023.04.17
학습 목표 

1. 프로젝트 생성 (mybankapp)
2. 의존성 설정 
3. yml 파일로 변경 처리 하기 
4. h2 메모리 디비에 접근 하기 ( http://localhost:8080/h2-console )
5. index.html 파일 연결 확인 
6. git 설정 - 프로젝트 단위

dependencies {
	implementation 'org.springframework.boot:spring-boot-starter-web'
	compileOnly 'org.projectlombok:lombok'
	developmentOnly 'org.springframework.boot:spring-boot-devtools'
	runtimeOnly 'com.h2database:h2'
	annotationProcessor 'org.projectlombok:lombok'
	testImplementation 'org.springframework.boot:spring-boot-starter-test'
}

추가해야 할 의존성


implementation 'org.apache.tomcat.embed:tomcat-embed-jasper'
implementation 'javax.servlet:jstl'
implementation 'org.mybatis.spring.boot:mybatis-spring-boot-starter:2.3.0'


의존성 간단 설명

implementation 'org.apache.tomcat.embed:tomcat-embed-jasper’

Tomcat에서 JSP를 처리하기 위해 필요한 라이브러리 중 하나 입니다.

Embedded Tomcat은 스프링 부트(Spring Boot)에서 내장된 Tomcat 서버를 사용하는 것으로, 
외부 Tomcat 서버를 설치하고 구성할 필요 없이 애플리케이션을 실행할 수 있습니다. 
**`tomcat-embed-jasper`** 라이브러리는 Embedded Tomcat에서 JSP를 처리하기 위해 Jasper라는 
JSP 컴파일러와 관련된 기능들을 제공합니다.

**implementation 'javax.servlet:jstl'
`javax.servlet:jstl`**은 JSP(Java Server Pages)를 개발할 때 사용되는 태그 라이브러리인 
JSTL(JavaServer Pages Standard Tag Library)을 제공하는 라이브러리입니다.

JSP는 Java 언어 기반으로 웹 페이지를 동적으로 생성하는 기술이며, 
JSTL은 JSP에서 반복문, 조건문, 데이터베이스 연동 등과 같은 일반적인 로직 처리를 수행할 수 있도록
여러 가지 태그를 제공합니다.

**`javax.servlet:jstl`** 라이브러리는 JSTL의 구현체를 포함하고 있으며, 
JSP 페이지에서 JSTL 태그를 사용하기 위해 프로젝트에 의존성으로 추가됩니다

**org.mybatis.spring.boot:mybatis-spring-boot-starter:2.3.0**
스프링 부트(Spring Boot)에서 MyBatis를 사용하기 위해 필요한 라이브러리 중 하나 입니다.

MyBatis는 SQL 매퍼 프레임워크로, **객체와 SQL 쿼리를 매핑하여** 개발자가 
SQL 쿼리를 직접 작성하지 않아도 데이터베이스에 접근할 수 있도록 지원합니다. 

**runtimeOnly 'com.h2database:h2’
runtimeOnly :**
Gradle에서 라이브러리 의존성을 추가할 때 사용하는 키워드 중 하나로, 
런타임 시에만 해당 라이브러리가 필요한 경우에 사용됩니다. 
즉, 빌드 시에는 해당 라이브러리가 필요하지 않지만, 실행 시에만 필요한 경우 사용됩니다.

**`com.h2database:h2`**는 자바 기반의 관계형 데이터베이스 관리 시스템(RDBMS)인 
H2 Database를 제공하는 라이브러리입니다.
****

H2 Database는 인메모리 데이터베이스(in-memory database)를 지원하므로, 
개발 및 테스트용 데이터베이스로 매우 유용합니다.

****인메모리 데이터베이스(In-memory database)는 디스크나 파일 시스템 대신 주 메모리(RAM)에 
데이터를 저장하고, 이를 활용하여 데이터를 조회하고 수정하는 데이터베이스입니다.

인메모리 데이터베이스는 디스크에 저장되지 않기 때문에 데이터베이스의 I/O 작업이 없어 빠른 속도로
데이터를 처리할 수 있습니다. 또한, 메모리에 저장되기 때문에 영속성을 가지지 않아서 애플리케이션이
종료되면 데이터가 모두 사라지는 휘발성 데이터베이스입니다.

yml 파일 설정 하기 (기본 설정)

server:
  port: 8080
  servlet:
    encoding:
      charset: utf-8
      force: true


spring:
  mvc:
    view:
      prefix: /WEB_INF/view/
      suffix: .jsp
  datasource:
    url: jdbc:h2:mem:testdb;MODE=MySQL
    driver-class-name: org.h2.Driver
    username: sa
    password:  
  
  h2:
    console:
      enabled: true
  output:
    ansi: 
      enabled: always

'Spring boot > spring boot 앱 만들어 보기 2 단원' 카테고리의 다른 글

bank app 화면 구현(1)  (0) 2023.04.17
bank app MyBatis 설정  (0) 2023.04.17
bank app - h2 db 초기 값 설정  (0) 2023.04.17
bank app 모델링  (0) 2023.04.17
패키지 설정  (0) 2023.04.17

+ Recent posts