1. Exception Handler 처리
2. @ControllerAdvice 와 @RestControllerAdvice 에 차이점을 이해 하자
3. 사용자 정의 예외 클래스를 만들어 보자.
4. 직접 예외 발생 시켜 보기 (사용자 정의 예외 클래스 활용)
5. 예외 페이지 생성 및 활용 (errorPage.jsp 생성)
Exception Handler
스프링 MVC 의 중요한 구성 요소 중에 하나로 AOP 기반에 개념 입니다.
구현하는 방법 중 하나는 @ExcetptionHandler 어노테이션을 사용하고 이 어노테이션은
예외가 발생한 메서드를 구현하고, 처리할 예외 타입을 지정합니다.@ControllerAdvice 와 @RestControllerAdvice 에 차이점
@ControllerAdvice와 @RestControllerAdvice는 모두 예외 처리를 담당하는 클래스에
붙는 어노테이션으로 스프링에서 예외 처리를 담당하는 핵심적인 요소 중 하나입니다.
그러나 두 어노테이션에 차이점은 반환 타입과 기본 응답 형태 입니다.
@ControllerAdvice 어노테이션은 View 렌더링을 위해 ModelAndView 형태로 객체를 반환하도록
기본 설정이 되어 있습니다. 즉 요청에 대한 응답이 view 형태로 전달되며,
JSP 와 같은 템플릿 엔진을 사용할 수 있습니다.
반면에 @RestControllerAdvice RESTfull 웹 서비스에서 사용하기 적합한 형태로
응답 처리가 되며 응답에 형태는 JSON, XML 형태로 반환이 됩니다.패키지 구조
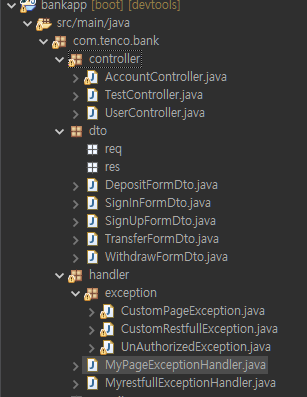
사용자 정의 클래스 만들어 보기
package com.tenco.bank.handler.exception;

import org.springframework.http.HttpStatus;

import lombok.Getter;

// Ioc 대상이 아님 (필요할 때 직접 new 처리)
@Getter
public class CustomRestfullException extends RuntimeException {

	private HttpStatus status;
	// throw new CustomRestfullException('페이지 못 찾음', 404);
	public CustomRestfullException(String message, HttpStatus status) {
		super(message);
		this.status = status;
	}

}
package com.tenco.bank.handler.exception;

import org.springframework.http.HttpStatus;

public class CustomPageException extends RuntimeException {

	private HttpStatus status;

	public CustomPageException(String message, HttpStatus status) {
		super(message);
		this.status = status;
	}

}
ExceptionHandler 처리 하기 - @RestControllerAdvice 사용
package com.tenco.bank.handler;

import org.springframework.web.bind.annotation.ExceptionHandler;
import org.springframework.web.bind.annotation.RestControllerAdvice;

import com.tenco.bank.handler.exception.CustomRestfullException;

/**
 * 예외 발생 시 (Json, XML)
 * 데이터를 내려 줄 수 있다
 */
@RestControllerAdvice // IoC 대상 + AOP 기반
public class MyRestfullExceptionHandler {

	@ExceptionHandler(Exception.class)
	public void exception(Exception e) {
		System.out.println(e.getClass().getName());
		System.out.println(e.getMessage());
	}

	// 사용자 정의 예외 클래스 활용
	@ExceptionHandler(CustomRestfullException.class)
	public String basicException(CustomRestfullException e) {
		StringBuffer sb = new StringBuffer();
		sb.append("<script>");
		// 반드시 마지막에 ; 콜론을 붙어서 사용하자.
		sb.append("alert('"+ e.getMessage() +"');");
		sb.append("history.back();");
		sb.append("</script>");
		return sb.toString();
	}
}
ExceptionHandler 처리 하기 - @ControllerAdvice 사용
package com.tenco.bank.handler;

import org.springframework.http.HttpStatus;
import org.springframework.web.bind.annotation.ControllerAdvice;
import org.springframework.web.bind.annotation.ExceptionHandler;
import org.springframework.web.servlet.ModelAndView;

import com.tenco.bank.handler.exception.CustomPageException;

/**
 *
 * View 렌더링을 위해 ModelAndView
 * 객체를 반환하도록 기본 설정 되어 있다.
 * 예외 page를 리턴하도록 활용 예정
 */
@ControllerAdvice
public class MyPageExceptionHandler {

	// 사용자 정의 클래스 활용
	@ExceptionHandler(CustomPageException.class)
	public ModelAndView handleRuntimePageException(CustomPageException e) {
		// ModelAndView 활용 방법
		ModelAndView modelAndView = new ModelAndView("errorPage");
		modelAndView.addObject("statusCode", HttpStatus.NOT_FOUND.value());
		modelAndView.addObject("message", e.getMessage());
		return modelAndView;
	}
}
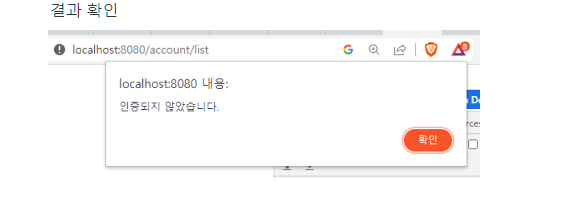
예외 발생 시켜 보기 1,2
public class AccountController {

	/**
	 * 계좌 목록 페이지
	 * @return 목록 페이지 이동
	 */
	@GetMapping({"/list", "/"})
	public void list() {
		// todo 예외 테스트 - 삭제 예정
		//throw new CustomRestfullException("인증되지 않은 사용자 입니다.", HttpStatus.UNAUTHORIZED);
		throw new CustomPageException("페이지를 찾을 수 없습니다", HttpStatus.NOT_FOUND);

		// return "/account/list";
	}
... 생략
}
예외 페이지 생성 및 활용 (errorPage.jsp 생성) /WEB-INF/view/errorPage.jsp 생성
<%@ page language="java" contentType="text/html; charset=UTF-8"
    pageEncoding="UTF-8"%>
<%@ page isErrorPage="true" %>
<!DOCTYPE html>
<html>
<head>
<meta charset="UTF-8">
<title>Insert title here</title>
</head>
<body>
	<h1>에러 페이지</h1>
	<p>에러 코드 : ${statusCode}</p>
	<p>에러 메서지 : ${message}</p>

</body>
</html>'Spring boot > spring boot 앱 만들어 보기 2 단원' 카테고리의 다른 글
| bank app - 로그인 처리 (0) | 2023.04.19 |
|---|---|
| bank app - 회원가입(트랜잭션처리) (0) | 2023.04.19 |
| bank app - 화면 구현(2) (0) | 2023.04.17 |
| bank app 화면 구현(1) (0) | 2023.04.17 |
| bank app MyBatis 설정 (0) | 2023.04.17 |